
Introduction: Why I Decided to Do It Myself
My experience has always been that of the type of person who will call an electrician to handle the tiniest electrical job. Doing the wiring? I'm not interested. I'd rather leave it to professionals. Recently, however after watching too many DIY videos on home improvement I pondered, "Why not try installing a GFCI outlet myself? "
The idea at first appeared daunting. Electricity is risky, surely? What if I screw up and hurt myself? However, I realized that if I could master how to avoid it I'd not only save money, but also learn an ability that I've never had before. Then I decided to go for it.
 Step 1: Research & Learning (Days 1-3)
Before I touched anything, I did some doing research. I wanted to know:
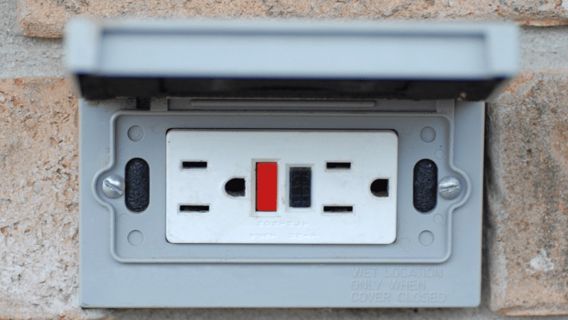
What does a GFCI outlet is (it turns off power when it detects a ground fault, thus preventing the risk of shocks).
Where should it be put in (kitchens bathrooms, kitchens, garages, outdoor spaces--anywhere close to water).
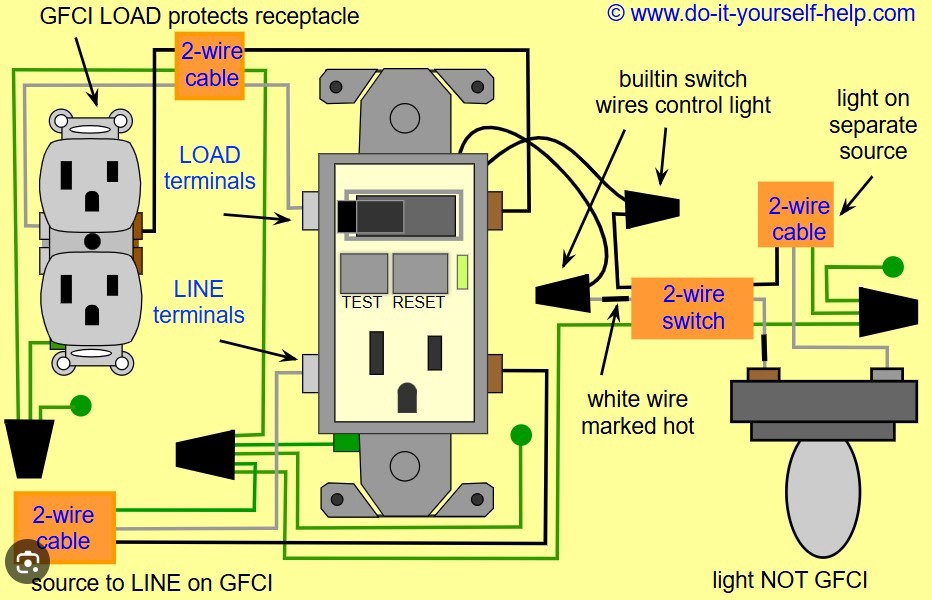
What is the best way to connect it properly (the distinction between the terminals LINE and LOAD was critical! ).
I came across two very useful guides that break everything down
The GFCI Outlet Installation Manual (TR, WR & Panel Setup) - This detailed wiring, tamper resistant (TR) as well as weatherproof (WR) versions, as well as how to connect them to an electrical panel.
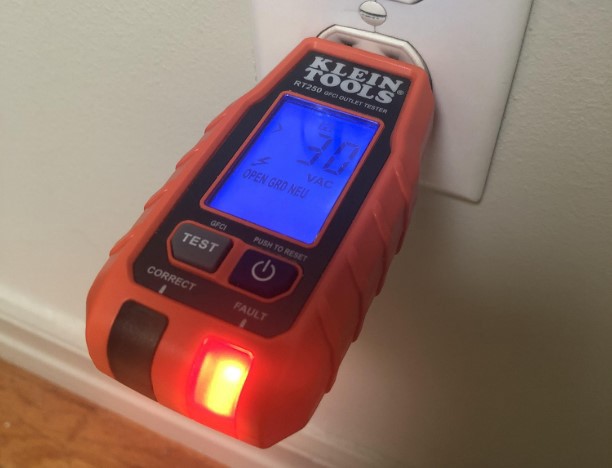
What is HTML0? Use a GFCI tester to ensure electrical safety Testing was essential and this article helped me verify my work.
I also have watched YouTube tutorials (big shout-out for The Old House and DIY Electricians) to observe the procedure in motion.
Step 2: Gathering Tools & Materials (Day 4)
Armed with information I created an inventory list of items to buy:
Tools & Supplies Needed:
GFCI Outlet - I selected an Leviton SmartLock PRO TR model (TR for tamper-resistant) since safety was the primary concern! ).
Voltage Tester to confirm that the power was not on ( critical step!).
Screwdrivers (Flathead and Phillips) - For removing the old outlet and to secure wires.
Wire strippers to cleanly strip insulation from wires.
Needle Nose Pliers to bend and attaching wires.
Electric Tape Additional insulation for security.
GFCI Tester - To verify proper installation.
(If you require advice, I purchased the bulk equipment at Home Depot and Amazon--affordable and reliable! )
 Step 3: The Actual Installation (Days 5-6)
Safety first: The circuit breaker was turned off and I double-checked the test of voltage to confirm that there was there was no power flowing through the outlet.
Step-by-Step Process:
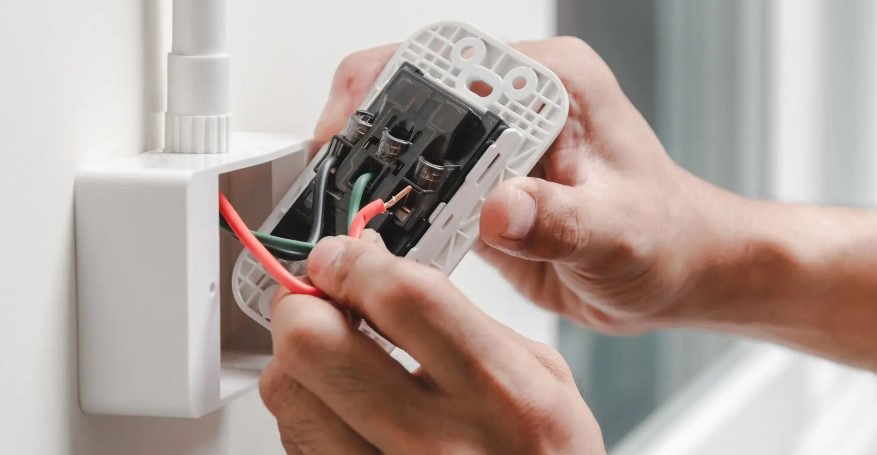
removed the old Outlet - Removed the faceplate, pushed away the outlet that was previously used, and noted the wires:
black (Hot) - Connected to a brass screw.
white (Neutral) - Connected to a silver screw.
Bare Copper (Ground) - Connected to green screw.
Created the Wires Then, we stripped approximately 1 inch insulation from each wire to ensure a clean connection.
Connected to the GFCI Outlet Following the steps I checked:
LINE wires (from the panel) - Went to the LINE terminals.
LOD wires (if you are extending security) - Went to the terminals for LOAD (I didn't require this to set up my configuration).
Ground wire is secured under the screw in green.
Connected to the Outlet and Tested - Folded the wires carefully back and connected in the GFCI in the outlet and then turned the power off. After that, I used the the GFCI tester (as described within the guide to the GFCI tester) for me to verify it was operating in a correct manner.
Step 4: Success! (And Cost Comparison)
Total Time Spent:
Study: 3 days
Shopping: 1 day
Setup: 2 days (I did my best!)
Testing and Final Tests: two weeks (wanted to be 100% certain)
Cost Breakdown:
GFCI Outlet: $15
Voltage Tester: $10
GFCI Tester: $12
Other Tools (already had the most): ~$5 (just tape and a few other items)
Total DIY Cost: ~$42
Vs. Hiring an Electrician:
Cost of an electrician for this job is $100-$200 (local)
I've saved around $60-$150!

Final Thoughts & Lessons Learned
It's not as scary as It Looks with proper investigation and safety checks even a novice can master it.
Testing is essential Don't miss using the test GFCI--it makes sure that everything is working without risk.
Learning for free is worth it The tutorials I came across (like that of the Blikai GFCI tutorial for installation) are lifesavers.
An Empowering Feeling I'm now feeling at ease with tackling my next electrical project!
Conclusion
If you've ever considered doing your own electrical work, but were hesitantyou should take it on! Start small (like the GFCI outlet) and follow the trusted guidelines and always put safety first. With a little perseverance and the right resources you can make it happen for anyone.
Would I repeat it? Absolutely! Perhaps the next time I'll think about installing the dimming switch...
0 件のコメント
この投稿にコメントしよう!
この投稿にはまだコメントがありません。
ぜひあなたの声を聞かせてください。